The debate over ultralight gear isn’t about its price tag; it’s a fundamental misunderstanding of its purpose. It’s not about buying lighter things, but about buying into a more efficient system.
- Every gram saved is a direct investment in on-trail energy, enabling more distance, less fatigue, and a deeper connection with the wilderness.
- The effectiveness of ultralight gear is directly tied to a hiker’s skill level—as your knowledge grows, your pack weight can safely shrink.
Recommendation: Stop evaluating gear based on dollars and start calculating its “Energy Return on Investment” (Energy ROI) for every item you carry.
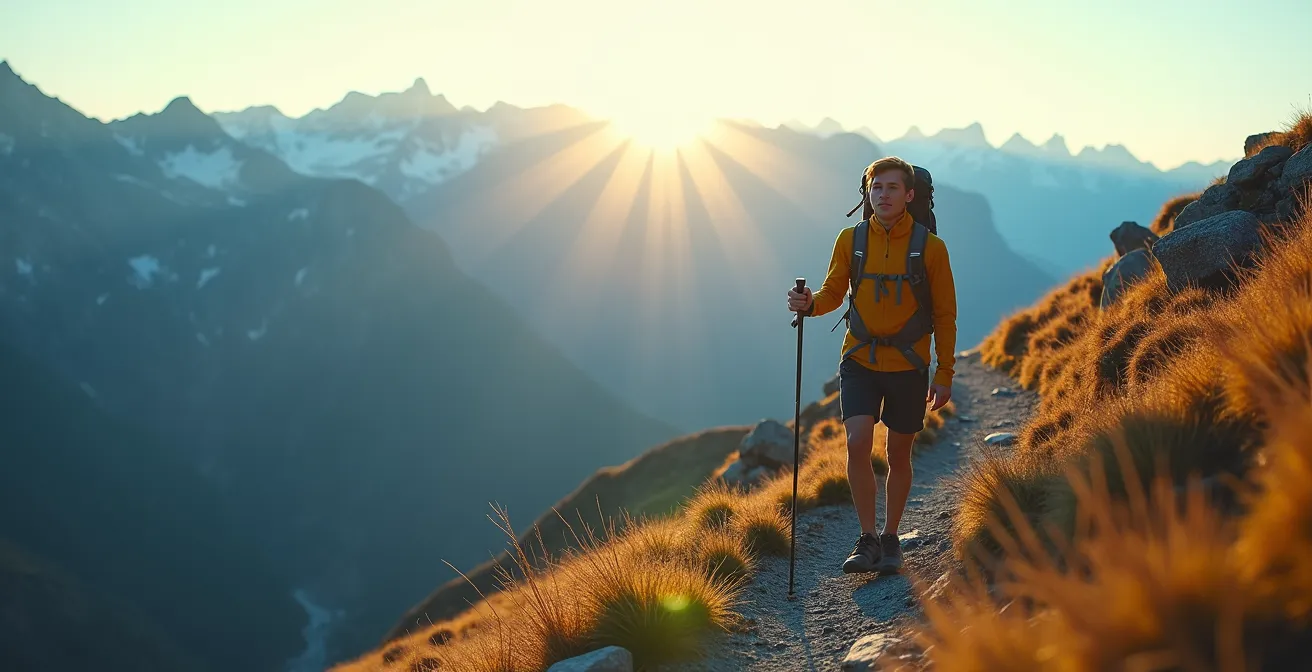
The question echoes across online forums and trailside debates: is spending hundreds of dollars to save 500 grams on a backpack or tent really worth it? For the hiker comparing a sturdy, traditional pack to a gossamer-thin Dyneema one, the price difference seems absurd. This debate frames the ultralight philosophy as a simple, expensive transaction. But that’s the first mistake. The true “cost” isn’t monetary; it’s measured in watts of energy expended, in joint impact over thousands of steps, and in the mental friction that a heavy, cumbersome system creates.
Most advice centers on the “Big Three”—pack, shelter, and sleep system—as the primary targets for weight reduction. While true, this is only the surface. The ultralight mindset is a holistic system where gear, skills, and body mechanics are interconnected. It’s about systemic efficiency, not just individual item weights. It’s a philosophy that challenges you to ask not “what if I need this?” but “can my skills make this unnecessary?”.
This guide reframes the entire discussion. We’re moving beyond the dollar sign to the core of the ultralight ethos: energy as the ultimate currency. This isn’t about blindly chasing the lowest base weight; it’s about making strategic investments in lightness to maximize your energy, reduce the risk of injury, and ultimately, amplify your experience in the wild. We’ll deconstruct the system, from your feet to your food, to reveal why saving that 500g is not a luxury, but a profound strategic advantage.
This article dissects the core components of the ultralight system, moving from foundational gear choices to the advanced skills that truly unlock its potential. The following sections will guide you through this strategic approach to gear optimization.
Contents: A Thru-Hiker’s Guide to Systemic Weight Reduction
- Why Trail Runners Are Replacing Boots for Long-Distance Hikes
- How to Layer Clothing to Prevent Sweat-Induced Hypothermia?
- Freestanding or Trekking Pole Tent: Which Handles Wind Better?
- The Mistake of Packing Too Much Water Weight in Food
- Adjusting Your Pack: The Torso Length Measurement You Must Know
- The Risk of Solo Trekking in Unmapped Territories
- E-Bike or Manual: Which Provides the Best Touring Experience?
- Why Learning Bushcraft Skills Reduces Daily Anxiety?
Why Trail Runners Are Replacing Boots for Long-Distance Hikes
The single greatest return on energy investment starts at your feet. For decades, heavy, stiff hiking boots were considered non-negotiable for serious treks, prized for their ankle support and durability. However, the long-distance hiking community has overwhelmingly shifted to trail runners, and the reason is pure physics. As proven by extensive research, weight carried on the feet expends four to six times more energy than weight carried on the back. A typical 1.4 kg pair of boots has the same energy cost as adding nearly 7 kg to your backpack. In contrast, a 450g pair of trail runners is equivalent to just 2.2 kg on your back. Over a 30 km day, this energy saving is monumental.
The argument for ankle support in boots often crumbles under scrutiny for most on-trail hiking. Stronger feet and ankles, developed through gradual adaptation to more flexible footwear, provide more dynamic and responsive support than a stiff leather cuff. Furthermore, research shows trail runners are approximately 40% lighter than traditional hiking boots, which not only saves energy but also reduces the repetitive stress impact on joints like knees and hips. Their breathable mesh construction allows them to dry quickly after a river crossing, preventing the moisture buildup that leads to blisters—a far more common trail-ending injury than a rolled ankle.
The switch isn’t a free lunch; it requires a systemic approach. Lighter footwear performs best with a lighter overall pack weight, as it reduces the forces the shoes and your feet need to manage. It’s a synergistic relationship: a lighter pack enables lighter shoes, which saves massive amounts of energy, making the entire hiking experience more fluid and less fatiguing. For any hiker serious about distance and efficiency, the boot debate is over. The question is no longer *if* you should switch, but *how* you should manage the transition.
How to Layer Clothing to Prevent Sweat-Induced Hypothermia?
On the trail, your greatest thermal threat is often not the cold, but your own sweat. As you exert energy climbing a pass, your body produces heat and moisture. If that moisture gets trapped in your clothing, it eliminates the insulating properties of the fabric. When you stop, the rapid cooling of that trapped sweat can lead to a dangerous drop in core body temperature, a condition known as sweat-induced hypothermia. The ultralight approach to clothing is not about packing one big, warm jacket; it’s about a dynamic, multi-part system designed for active moisture management.
This system consists of distinct, breathable layers that work in concert. A merino or synthetic base layer wicks moisture away from the skin. An active insulation piece, like a fleece or a highly breathable synthetic vest, provides warmth while allowing water vapor to escape. Finally, a wind shirt or a waterproof/breathable shell protects from the elements without trapping perspiration. The key is to constantly adjust these layers *before* you start to sweat heavily on an ascent or get cold on a descent. This is called active thermoregulation.
The following image breaks down the components of a modern, ultralight layering system, showing how each piece contributes to overall breathability and weather protection.
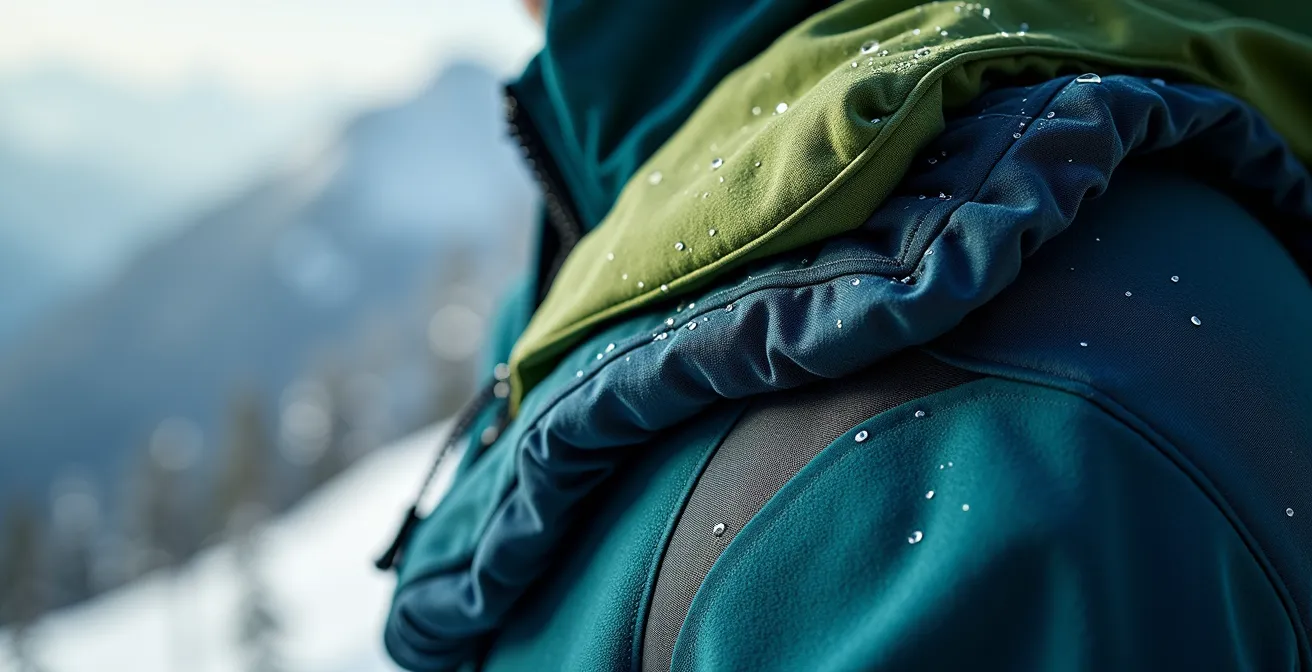
As the visual demonstrates, each layer is thin and specialized. This modularity is the system’s strength. Instead of a single, bulky jacket that is either “on” (too hot) or “off” (too cold), you have a versatile toolkit. Feeling a slight chill? Add the 90-gram wind shirt. Starting a steep climb? Shed the active insulation layer. This constant, proactive management of your microclimate is a core ultralight skill. It keeps you drier, safer, and allows you to carry a lighter, more efficient set of clothes that can handle a wider range of conditions.
Freestanding or Trekking Pole Tent: Which Handles Wind Better?
The shelter debate often pits the convenience of a freestanding tent against the extreme lightness of a trekking pole-supported tent. Freestanding tents, with their dedicated pole structures, can be pitched almost anywhere, even on solid rock. They are intuitive and fast to set up. Trekking pole tents, however, leverage the poles you already carry to create a structure, dramatically reducing pack weight. A common misconception is that their non-rigid design makes them weaker in the wind. The opposite is often true.
A well-pitched trekking pole tent, made from materials like Dyneema Composite Fabric (DCF), is a fortress. Its strength comes not from rigid poles that can snap, but from the tension and geometry of its guylines, anchored securely into the ground. By using strong stakes and proper technique, a hiker can create an incredibly stable, aerodynamic structure that flexes and sheds wind rather than fighting it. As tent designer and ultralight icon Dan Durston notes, a trekking pole tent pitched with skill is far more resilient than a freestanding tent placed without thought to wind direction or terrain. The “skill-to-weight ratio” is paramount here; the weight savings are a direct reward for the time invested in learning proper pitching techniques.
The following table, based on data from numerous trail tests and gear analyses, compares the two systems across key performance metrics. While a freestanding tent offers flexibility, an analysis shows a trekking pole tent provides superior performance-to-weight in challenging conditions, provided the user has the requisite skills.
| Factor | Freestanding Tent | Trekking Pole Tent |
|---|---|---|
| Weight Range | 900-1800g | 450-900g |
| Wind Resistance (properly pitched) | Good (25-35 mph) | Excellent (30-40+ mph with proper technique) |
| Setup Time in Wind | 5-10 minutes | 10-20 minutes (skill dependent) |
| Site Selection Flexibility | High – works on any flat surface | Medium – needs stake-able ground |
| Skill Requirement | Low – intuitive setup | High – requires practice and technique |
Ultimately, the choice reflects a hiker’s philosophy. The freestanding tent prioritizes convenience and appeals to those who want a simple, foolproof solution. The trekking pole tent is for the hiker who views their gear and skills as an integrated system, and who is willing to trade a few minutes of setup time for a 50% reduction in shelter weight and superior storm-worthiness.
The Mistake of Packing Too Much Water Weight in Food
After the “Big Three,” the heaviest item in a hiker’s pack is often their food. And the single biggest mistake is carrying food that is heavy with water. Water is essential, but it should be sourced from the trail, not carried in your food bag. The guiding principle of ultralight food planning is caloric density. The goal is to maximize the number of calories per gram, which means choosing foods that are dehydrated, high in fat, and low in moisture. Most thru-hikers learn this the hard way after hauling a jar of peanut butter or a bag of fresh apples for three days.
The gold standard for caloric density is fat, which provides 9 calories per gram, compared to 4 for carbohydrates and proteins. This is why items like olive oil, nuts, and Fritos are staples in an ultralight pantry. Expert menu planning aims for an average caloric density across all food items. According to research on lightweight backpacking, the ideal caloric density target is between 120-130 calories per ounce (or about 4.2-4.6 kcal/gram). Foods that fall below this threshold, like fresh pasta or many “just-add-water” meals with low fat content, are essentially dead weight.
This comparative table illustrates the dramatic difference in caloric efficiency between common trail foods. It highlights why a small bottle of olive oil to add to meals is one of the most weight-efficient items a hiker can carry.
| Food Item | Calories/oz | Water Content | Cost/1000 cal |
|---|---|---|---|
| Olive Oil | 250 | 0% | $2.50 |
| Almonds | 165 | 5% | $3.00 |
| Freeze-dried Meals | 125 | 3% | $8-12 |
| Instant Noodles | 120 | 5% | $1.50 |
| Peanut Butter | 166 | 2% | $2.00 |
| Fresh Pasta (cooked) | 45 | 62% | $3.50 |
Optimizing food is a game of ounces that add up to pounds. It requires a shift in thinking: from packing what sounds appetizing at home to packing what is most efficient on the trail. By repackaging food into ziplock bags, removing all unnecessary commercial packaging, and meticulously planning meals around a high caloric density target, a hiker can easily shave kilograms off a week’s worth of food, another critical investment in on-trail energy.
Adjusting Your Pack: The Torso Length Measurement You Must Know
You can have the lightest pack in the world, but if it doesn’t fit correctly, it will feel heavier and cause more pain than a traditional pack that fits like a glove. The single most critical measurement for pack fit is your torso length—not your overall height. This is the distance from your C7 vertebra (the bony bump at the base of your neck) to your iliac crest (the top of your hip bones). An ill-fitting pack places weight on your shoulders instead of your hips, leading to nerve impingement, shoulder pain, and extreme fatigue. This is where the ultralight “system” breaks down if not properly implemented.
Most high-quality ultralight packs come in different torso sizes or offer adjustability. Getting this measurement right is the first step. The second, and equally important, step is learning how to dynamically adjust the pack on the trail. A pack is not a “set it and forget it” item. The fit should be micro-adjusted throughout the day to shift the load, relieve pressure points, and adapt to changing terrain. The load lifters, for example, are crucial for pulling the pack’s weight in towards your center of gravity, but their angle and tension need to change as you go uphill versus downhill.
Case Study: The Real Cost of a Bad Fit
The importance of fit over sheer weight was demonstrated in a field test involving ultralight frameless packs. A comprehensive analysis of pack fit on energy expenditure showed that an improper torso length adjustment increased the perceived effort of the hike by 15-20%. More alarmingly, three out of the five test subjects experienced shoulder nerve impingement after just 10 miles with the ill-fitting packs. After correctly sizing the packs to each hiker’s torso, all reported hot spots were reduced and the nerve issues were completely eliminated. The study proved that a properly fitted 800g pack delivers a far superior carrying experience than an ill-fitting 1.8kg traditional pack, turning the weight savings into a genuine performance gain rather than a source of pain.
A truly optimized system involves constant interaction with your gear. A seasoned thru-hiker is perpetually fine-tuning their pack’s straps to maintain comfort and efficiency. This checklist outlines the dynamic adjustments that should become second nature.
Your Action Plan: Dynamic Pack Adjustment on the Trail
- Uphill: Loosen shoulder straps 1-2 inches to shift more weight directly onto your hips, freeing your shoulders for the climb.
- Downhill: Tighten shoulder straps to pull the pack closer to your back, preventing it from pushing you forward and throwing you off balance.
- Traversing: Slightly tighten the hip belt on the uphill side of your body to increase stability and prevent the pack from swaying.
- Rocky or uneven terrain: Snug all straps—shoulder, sternum, and load lifters—to minimize any pack movement and maintain your center of gravity.
- Check and readjust: Your load lifter straps should maintain a 30-45 degree angle. Check and readjust all straps at least every two hours or after any significant change in elevation.
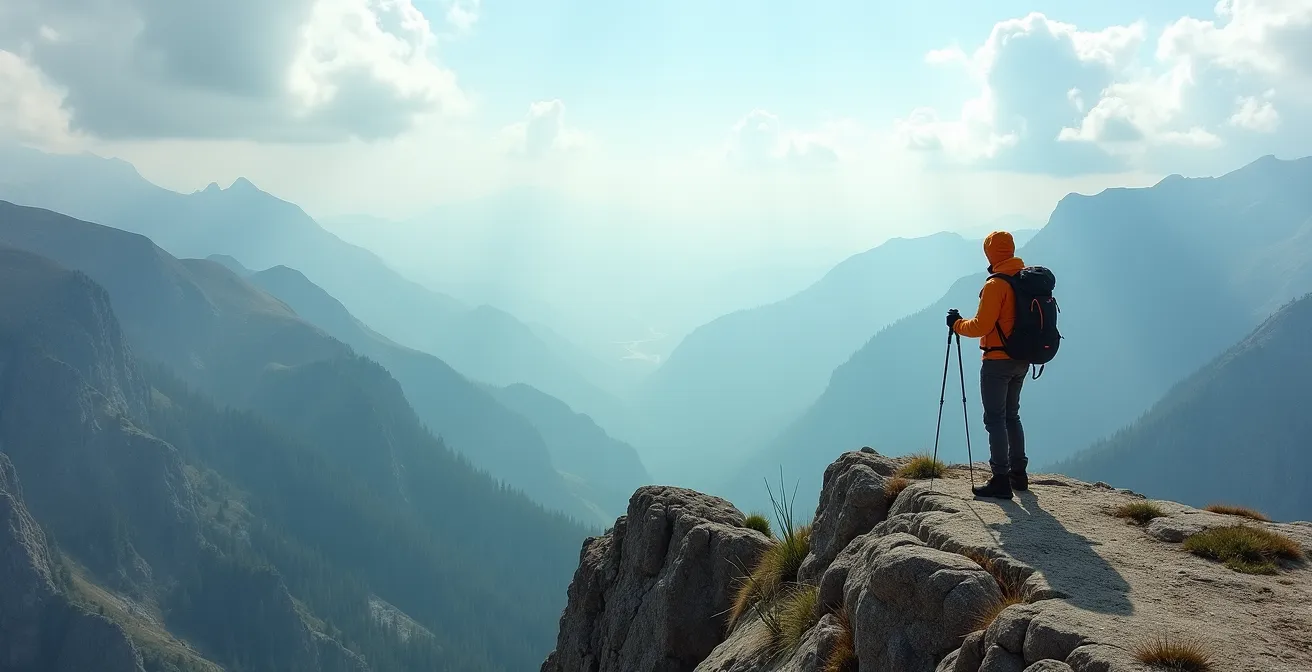
The Risk of Solo Trekking in Unmapped Territories
The ultralight philosophy can be taken too far. Dropping weight by leaving behind essential safety and navigation tools, especially when hiking solo in remote or off-trail environments, is not ultralight; it’s ultra-foolish. The weight of your pack should be inversely proportional to your skills and experience. As your wilderness knowledge grows, you can safely reduce your gear’s weight. But for those pushing into unmapped territories, the focus must shift from weight reduction to intelligent redundancy.
In these environments, a single point of failure can be catastrophic. A dead phone with your GPS app is not an inconvenience; it’s a life-threatening emergency. A wet sleeping bag is not just uncomfortable; it’s a direct path to hypothermia. Intelligent redundancy means having multiple, independent systems for critical functions. For navigation, this means a paper map and compass, backed up by a GPS device or satellite messenger, which is in turn backed up by offline maps on a smartphone. Each system works on its own, ensuring you are never without a solution.
As the saying goes, two is one and one is none. This philosophy must be applied to fire, water purification, and emergency shelter. The added weight of these redundancies—a mini Bic lighter as a backup to your ferro rod, purification tablets as a backup to your filter—is the most valuable weight you will ever carry. It is the premium paid on an insurance policy against disaster. The obsession with a sub-5kg base weight is meaningless if it compromises your ability to self-rescue.
Your gear can only be as minimal as your wilderness skills are maximal.
– Andrew Skurka, Ultimate Hiker’s Gear Guide
This quote from legendary adventurer Andrew Skurka is the ultimate maxim. Before you remove an item from your pack to save 100 grams, you must be confident that you have the skill to replicate its function or the redundant systems to survive its failure.
E-Bike or Manual: Which Provides the Best Touring Experience?
At first glance, the worlds of ultralight hiking and e-bike touring seem diametrically opposed. One is about human-powered minimalism, the other about using a motor to assist. However, looking through the lens of the ultralight philosophy—maximizing experience by strategically reducing friction—reveals a surprising parallel. Both disciplines use technology to remove barriers that prevent a deeper engagement with nature. For the ultralight hiker, the barrier is the physical and mental burden of a heavy pack. For the e-bike tourer, the barrier might be a steep mountain pass or a 150km day that would be impossible on a manual bike.
The core driver is identical. A recent study of outdoor enthusiasts found a fascinating overlap: it revealed that 68% of dedicated ultralight hikers also embraced e-bikes for certain types of adventures. They didn’t see it as “cheating,” but as another tool for optimizing their experience. One participant, an accomplished Pacific Crest Trail thru-hiker with a 3kg base weight, used an e-bike to tour the Alps. His reasoning was clear: both choices served the same goal of removing physical limitations to allow for greater immersion in the environment. The ultralight pack allowed him to hike 40km days with ease, while the e-bike allowed him to cover 1,000 meters of elevation without destroying his legs for the next day’s ride.
This perspective shifts the debate from “which is purer?” to “which tool is right for the job?”. The ultralight philosophy isn’t a dogmatic rejection of technology; it’s a strategic application of it. Whether it’s a carbon fiber trekking pole that saves your knees on a descent or a motor that helps you crest a hill to see a sunset, the goal is the same: to reduce the struggle and amplify the joy. It’s about engineering the experience to be about the landscape, not the limitation.
Key Takeaways
- The ultralight journey progresses from optimizing gear (what you carry) to optimizing skills (what you know).
- True mastery lies in replacing manufactured grams with learned knowledge, increasing both capability and self-reliance.
- This progression ultimately transforms gear from a source of anxiety (“do I have the right stuff?”) to a simple, reliable toolkit.
Why Learning Bushcraft Skills Reduces Daily Anxiety?
The final and most profound stage of the ultralight journey is the transition from depending on gear to depending on knowledge. Every bushcraft or wilderness skill you acquire is weight you no longer have to carry. Learning to reliably locate water sources by reading the landscape means you can carry less water between streams. Mastering fire-making with a ferro rod or bow drill makes a backup stove and fuel canister redundant. This is the ultimate expression of the “skill-to-weight ratio.”
This substitution of skill for gear has a powerful psychological effect. A hiker laden with gear for every contingency is often a hiker burdened by anxiety. Their pack is heavy with “what-ifs.” In contrast, the hiker with a deep well of practical skills walks with a quiet confidence. They know that if their filter clogs, they can find and boil water. If their tent fails, they can construct a basic debris shelter. This self-reliance drastically reduces the background hum of anxiety that can accompany a trip into the wild. The wilderness transforms from a place of potential threats to a place of resources.
Quantifying the return on investment for skills is difficult, but one analysis offers a compelling perspective. When comparing the cost of ultralight gear against the time invested in learning, some have suggested that learning friction fire in 20 hours saves the equivalent of a $200 titanium stove, valuing your learning time at $10/hour. More importantly, that skill weighs nothing and can never be lost or broken. It is the ultimate piece of ultralight equipment.
The journey to a lighter pack begins not in a store, but with a spreadsheet and a commitment to learning. Start auditing your current gear list today and identify the first, most impactful gram to leave behind—or the first skill to acquire.