The greatest mistake in renovating a historic home is focusing on style (modern vs. traditional) instead of the core conservation principle of reversibility.
- Modern, non-breathable materials like Portland cement can trap moisture and permanently destroy historic brickwork from the inside out.
- Successful additions create a clear, honest dialogue with the original structure, acting as “respectful guests” rather than poor imitations.
Recommendation: Prioritize a “fabric first” audit of your home’s original materials and structural health before any design or cosmetic work begins.
The floorboards creak with stories, the light filters through wavy, original glass, and the walls hold a tangible sense of history. You love the soul of your historic home, but you also crave a warm, functional, and efficient space for modern life. This conflict is the central challenge for every period property owner. It’s the desire for a sleek, comfortable kitchen set against the backdrop of original, uneven plaster walls; the need for energy efficiency clashing with the beauty of single-pane sash windows.
Common advice often falls into generic platitudes like “blend old and new” or simply “hire a good architect.” This leads many well-intentioned homeowners down a path of irreversible damage, tempted by quick fixes like sealing old walls with impervious modern cement or replacing drafty windows with characterless uPVC units. These actions, though seemingly practical, can slowly suffocate a historic structure, trap damp, and erase the very character that makes the home valuable.
But what if the secret to a successful, value-enhancing modernization lies not in aesthetics, but in a core philosophy from conservation architecture? This is the principle of reversible intervention. It’s a mindset that treats every new element—from insulation to a full extension—as a temporary guest that should, in theory, be removable in the future without having harmed its original host. It’s about creating a respectful dialogue between eras, not a destructive argument.
This guide, written from the perspective of a conservation architect, will walk you through that professional methodology. We will move from understanding the fundamental chemistry of your walls to navigating heritage regulations, designing additions that celebrate both past and present, and integrating modern technology without leaving a permanent scar. This is how you modernize while protecting your home’s soul and its long-term value.
This article provides a comprehensive framework for your project. To help you navigate the key stages of a heritage-sensitive renovation, the following sections break down the most critical considerations, from material science to design philosophy.
Summary: The Architect’s Method: Modernize Your Historic Home and Enhance Its Value
- Why Using Modern Cement Can Destroy Historic Brickwork
- How to Navigate Heritage Listings When Planning Renovations?
- Restoration or Contrast: Which Design Approach Suits Your Addition?
- The Cost of Ignoring Asbestos in Pre-1990 Renovations
- Optimizing Insulation: How to Insulate Solid Walls Without Damp?
- How to Install a Smart Thermostat Without Hiring an Electrician?
- How to Design a Bedroom That Guarantees Deep Sleep?
- Form vs Function: Why Minimalist Design Often Fails Users?
Why Using Modern Cement Can Destroy Historic Brickwork
The single most destructive, yet common, mistake in historic home repair is “repointing”—replacing old mortar with modern Portland cement. To the untrained eye, it seems like a durable fix. In reality, it’s a ticking time bomb for your brickwork. Historic buildings were designed as breathable systems. They were built with soft, porous bricks and an equally soft, porous lime mortar. This combination allows moisture that enters the wall to escape naturally through the mortar joints. The mortar acts as a sacrificial element, being softer than the brick.
Modern Portland cement, by contrast, is incredibly hard, dense, and non-breathable. When it’s used to repoint a historic wall, it traps moisture behind it. In a freeze-thaw cycle, this trapped water freezes, expands, and exerts immense pressure on the face of the bricks. Since the cement is harder than the brick, the brick itself is what fails. This process, known as spalling, causes the faces of your bricks to crumble and flake away, causing irreversible damage that is astronomically expensive to repair. Furthermore, the longevity is a false economy; research shows that lime mortar lasts 30-50 years or more, while hard cement repairs on soft brick can fail and cause damage in as little as 10-15 years.
Understanding the material you’re working with is the first step in preservation. Before any work begins, you must identify your mortar type. This isn’t just an academic exercise; it’s a critical diagnostic step to protect your investment. Below is a simple checklist to help you perform a preliminary analysis.
Your Action Plan: Testing Your Mortar Type
- Color Test: Examine a clean, unweathered section of mortar. Is it off-white, cream, or sandy in color? This is characteristic of lime mortar. A flat, uniform gray color is the hallmark of modern Portland cement.
- Vinegar Test: Carefully apply a few drops of standard white vinegar to a small, inconspicuous mortar joint. Lime mortar, being calcium carbonate-based, will fizz and bubble quite dramatically. Portland cement will show little to no reaction.
- Hardness & Sound Test: Gently tap the mortar joint with a small hammer or the handle of a screwdriver. Portland cement is extremely hard and will produce a high-pitched, sharp “ring.” Lime mortar is much softer, and the tap will result in a duller, lower-pitched “thud.”
- Assess Previous Repairs: Look for areas with mismatched colors or textures. It’s common for historic homes to have had patch repairs with inappropriate cement mortar. These are your problem areas.
- Consult a Professional: If in doubt, have a sample analyzed. A conservation specialist can confirm the exact composition and specify a compatible lime-based mix for any necessary repairs, ensuring the long-term health of your home’s historic fabric.
How to Navigate Heritage Listings When Planning Renovations?
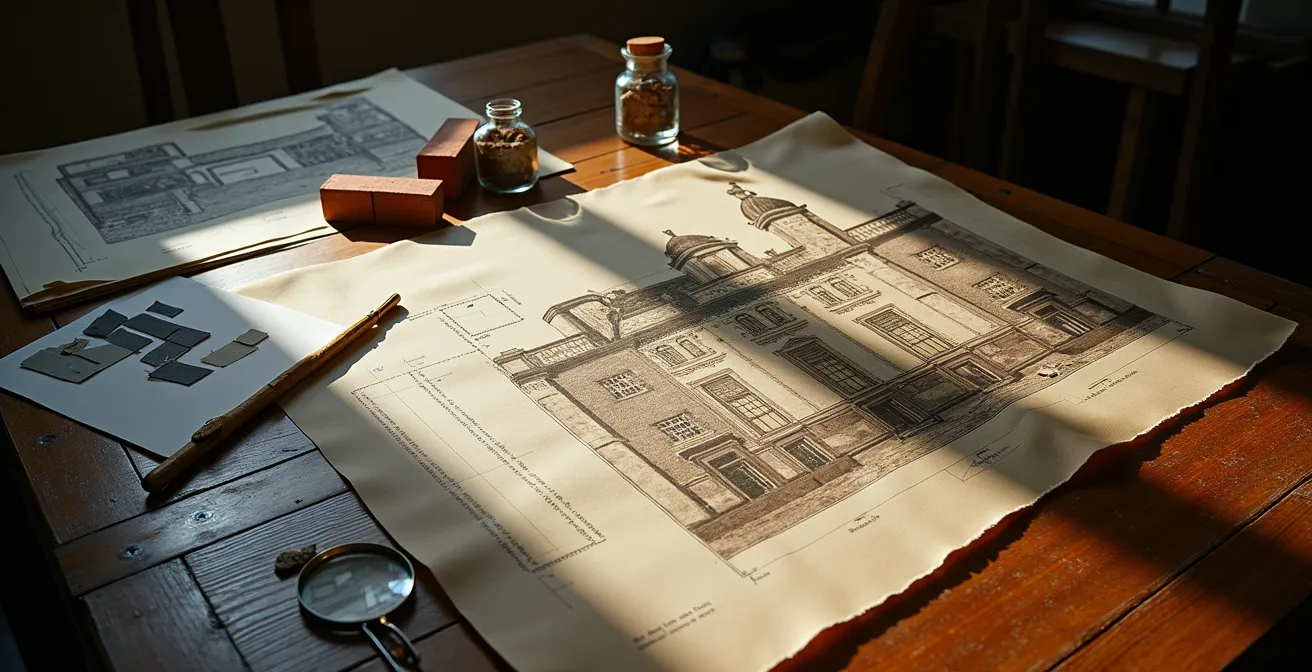
Owning a listed or designated heritage property is a custodianship. Before a single plan is drawn, your first call should not be to a builder, but to your local planning authority or historic preservation office. Navigating these regulations can seem daunting, but it is a collaborative process designed to protect the building’s significance. The key is to approach them with a philosophy of respect and a well-documented plan. Authorities are not there to forbid modernization, but to guide it in a way that is sympathetic to the historic fabric.
The process begins with understanding *why* your home is listed. The listing documentation will detail the specific features of significance—it could be the facade, the unique timber framing, the original windows, or even the layout. Your renovation plans must demonstrate how they will not harm these elements. This is where the principle of reversible intervention becomes your most powerful tool. As a guiding principle, good conservation practice dictates that modern changes should be distinct and, if needed, removable. As noted by a leading expert, this is a core tenet of modern conservation.
The best modern interventions are those that could, in theory, be removed in the future without permanent damage to the historic fabric.
– Scott T. Hanson, Restoring Your Historic House, The Comprehensive Guide for Homeowners
This approach shows respect for the building’s entire history, acknowledging your intervention as just one layer in a long story. It favors solutions like installing secondary glazing inside original windows over replacing them, or using freestanding kitchen units instead of building them into a fragile plaster wall. Documentation is your best ally: detailed architectural drawings, material specifications, and a written statement explaining your conservation philosophy will make the approval process smoother.
Case Study: The Westford 1893 Colonial Revival Fire Restoration
A powerful example of navigating regulations is shown in a PBS This Old House project following a severe house fire. The team’s primary goal was to save the home’s character-defining features. They successfully preserved the original, ornate center staircase through meticulous lead paint mitigation using infrared heat and hand tools, a method approved by the historic commission. Critically, the building department was persuaded to grant a variance, allowing the historically significant (but non-code-compliant) lower stairs to remain unmodified. This success was built on rigorous documentation and a clear commitment to preserving the home’s historic fabric, demonstrating that compromise and collaboration with authorities can lead to exceptional results.
As you can see, the path to approval is paved with thorough research and clear communication. Presenting your project not as a mere renovation but as a thoughtful conservation effort positions you as a partner in preservation, not an adversary. This mindset is crucial when dealing with the gatekeepers of your home’s heritage.
Restoration or Contrast: Which Design Approach Suits Your Addition?
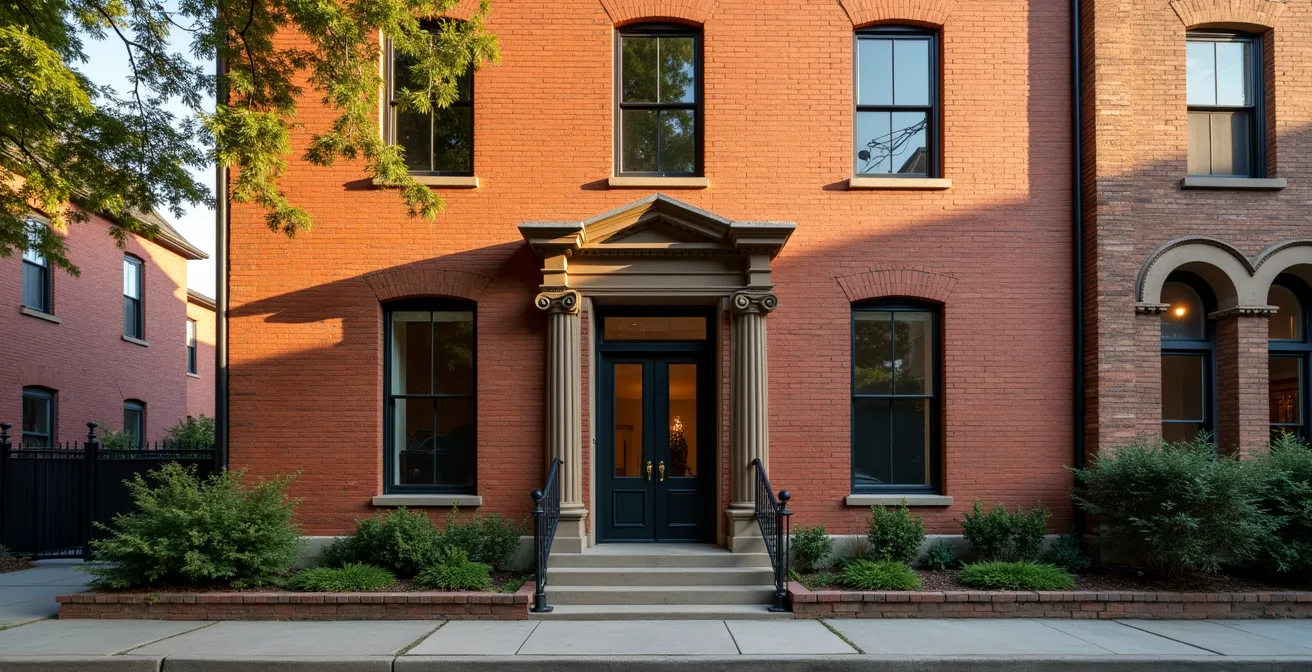
When adding space to a historic home, homeowners often face a paralyzing choice: should the addition flawlessly mimic the original architecture, or should it stand in bold, modern contrast? From a conservation standpoint, the answer is nuanced but clear: avoid faux-historic pastiche at all costs. Attempting to perfectly replicate historic details with modern materials and techniques often results in a “Disney-fied” version of the original. It can devalue the authenticity of the true historic fabric by creating confusion about what is original and what is new.
Instead, the most respected approaches create an honest and clear architectural dialogue between the old and new. This doesn’t necessarily mean a glass box has to be attached to a Victorian villa, but it does mean the new work should have its own integrity and be of its time. The addition should be a “respectful guest”—complementary to the host but clearly distinct. This can be achieved through massing, material choice, or detailing that relates to the original house without directly copying it. The key is legibility; a future historian should be able to read the story of the house and understand which part belongs to which era.
The choice of approach depends heavily on the specific context of your home, its architectural style, and your personal aesthetic. Below is a comparison of the three primary philosophies endorsed by preservation professionals.
| Approach | Visual Impact | Preservation Philosophy | Best For |
|---|---|---|---|
| Sympathetic Restoration | Seamless blend with original | Honors historic character | Victorian, Colonial homes |
| Bold Contrast | Clear distinction old vs new | Celebrates both eras | Industrial, warehouse conversions |
| Glass Link/Hyphen | Transparent separation | Respects without mimicking | Listed buildings, museums |
As this comparative analysis of renovation approaches suggests, the “Glass Link” or “Hyphen” is often considered the gold standard for highly sensitive listed buildings. It creates a transparent, lightweight connection that physically separates the mass of the old building from the new, respecting the form and integrity of the original structure completely. Ultimately, the most successful additions are those that are subordinate to the original building, allowing the historic home to remain the hero of the story.
The Cost of Ignoring Asbestos in Pre-1990 Renovations
If your historic home has had any work done between the 1930s and the late 1980s, you must assume asbestos is present until proven otherwise. This is not a matter for DIY; it is a serious health and safety issue that requires professional management. Ignoring it is not an option and can have devastating health consequences and catastrophic financial implications for your renovation project. Asbestos was a “miracle material” used in an astonishing range of building products, and disturbing it without proper protocols can release harmful fibers into the air.
The discovery of asbestos-containing materials (ACMs) will bring your renovation to an immediate halt. Before any further work can proceed, you are legally required to have the material tested by a certified lab and, if it is “friable” (easily crumbled), removed by a licensed abatement contractor. This is an unexpected cost that can derail a budget. According to 2025 data, asbestos removal costs an average of $2,236, but can easily climb much higher depending on the location and extent of the contamination.
Beyond the removal cost, there are knock-on effects. Your project will be delayed, potentially for weeks. This can impact contractor schedules and financing arrangements. Many lenders will not release funds for a renovation until they receive a certificate confirming the property is clear of hazardous asbestos. Therefore, the most prudent financial decision is to budget for asbestos testing and potential removal from the very beginning. Proactively commissioning an asbestos survey before you even finalize your design plans is the mark of a well-planned project. It transforms a potential crisis into a manageable line item, protecting both your family’s health and your financial stability.
Optimizing Insulation: How to Insulate Solid Walls Without Damp?
In the quest for a warm, energy-efficient historic home, many owners make the critical error of sealing solid walls with non-breathable insulation, like standard foam-backed plasterboard. This is the modern equivalent of using cement mortar and it creates the same problem: it traps moisture. Historic solid walls need to breathe. They manage moisture by allowing it to be absorbed and then evaporate away naturally. When you apply an impermeable barrier to the inside face, you cut off this escape route. Condensation gets trapped between the insulation and the cold wall, leading to interstitial condensation, mold growth, and the decay of timber elements embedded in the wall.
The key to insulating solid walls is to use vapor-permeable (breathable) materials that work in harmony with the original structure. These include materials like wood fiberboard, cork, or lime-hemp plaster. These products provide thermal resistance while still allowing moisture vapor to pass through, maintaining the wall’s natural equilibrium. This is a more specialized and often more expensive approach than standard dry-lining, but it is the only way to insulate safely without causing long-term structural damp problems.
However, insulating solid walls is a complex, high-cost intervention and should be one of the *last* things you do, not the first. A “fabric first” approach prioritizes the easiest, most cost-effective wins for heat loss. For most historic homes, the vast majority of heat escapes elsewhere. An 80/20 approach focusing on these key areas will yield the biggest improvements for the least initial outlay and disruption.
- Priority 1: Comprehensive draught-proofing of all windows, doors, and floorboards using high-quality, appropriate materials like wool or brush strips.
- Priority 2: Deep loft or attic insulation is typically the single most impactful and straightforward thermal upgrade you can make.
- Priority 3: Insulating suspended timber ground floors from below (in the crawlspace or cellar) prevents cold air from chilling the rooms above without disturbing historic floorboards.
- Priority 4: Installing well-made secondary glazing can offer thermal performance close to double glazing while preserving priceless original windows.
- Priority 5: Only after all the above are addressed should you consider the complex and expensive task of wall insulation, ensuring you use only breathable systems.
How to Install a Smart Thermostat Without Hiring an Electrician?
Integrating smart home technology into a historic property presents a classic conflict: how do you add modern convenience without chasing new wires into fragile, lath-and-plaster walls? For smart thermostats, the answer lies in choosing systems specifically designed for non-invasive installation. Chasing wires is often not an option, both for cost reasons and for the preservation of your home’s historic fabric. Thankfully, the market has evolved beyond systems that require complex rewiring at the boiler.
The first and simplest option is a battery-powered smart thermostat. Companies like Tado, Nest, and Hive offer models that can be placed anywhere in your home. These units communicate wirelessly with a small receiver that is wired directly into your boiler. The installation of the receiver is the only part that involves touching the heating system’s wiring. For a confident DIYer comfortable with basic wiring (and after shutting off power at the breaker), this can be a straightforward job of replacing the existing simple thermostat receiver with the new smart one. The thermostat itself then lives on a bookshelf or is mounted on the wall with simple screws, requiring no new wiring to that location.
A second, even less invasive approach, is to look for systems that can utilize your existing thermostat wiring. Many historic homes have a simple two-wire system running from the boiler to a single thermostat location. Some smart thermostats are designed to use this existing, low-voltage wiring for both power and communication, meaning you can simply swap the old dial thermostat for the new smart one without running any new cables through the walls. This is often the most seamless solution, provided your existing wiring is in good condition. Before purchasing, always check the manufacturer’s compatibility guide to ensure it will work with your specific “S-Plan” or “Y-Plan” heating system and existing two-wire setup.
How to Design a Bedroom That Guarantees Deep Sleep?
A bedroom in a historic home can be a sanctuary of calm, but it also comes with unique challenges to achieving deep, restorative sleep: traffic noise through single-pane windows, light pollution, and sound transfer through solid walls. Modernizing for sleep, however, does not require gutting the room and losing its character. The goal is to layer in modern solutions that are both effective and sympathetic to the historic interior, focusing on acoustics, light control, and air quality.
Noise is often the primary sleep disruptor. Original sash windows are beautiful but are poor acoustic insulators. Rather than replacing them—a move that would strip the house of a key feature—the most effective and reversible solution is high-performance secondary glazing. A well-sealed secondary unit installed on the interior can reduce noise levels by up to 80% and dramatically improve thermal comfort. This preserves the historic exterior and the delicate character of the original window from the inside.
Beyond the windows, the key is to use “soft” architecture and furnishings to absorb sound and control light. Heavy, floor-to-ceiling curtains with both a blackout layer and a thick interlining layer are a powerful tool. They not only achieve total darkness but also act as a formidable sound buffer. By thinking creatively, you can turn the room’s existing features into functional assets for better sleep.
- Layered Lighting: Avoid drilling into plaster for new spotlights. Instead, install discreet LED strips behind existing picture rails or cornices for a soft, indirect ambient light.
- Acoustic Buffering: Use dense, heavy elements to deaden sound. A large, floor-to-ceiling bookshelf filled with books placed against a party wall is a surprisingly effective and beautiful sound insulator.
- Air Circulation: Stuffy air can hinder sleep. Instead of a modern AC unit, consider a period-appropriate ceiling fan. Many designs complement historic aesthetics while significantly improving air circulation on still nights.
- Flooring: Retain original floorboards for character, but use a thick, dense wool rug with a high-quality underlay to absorb both airborne and impact sound from rooms below.
Key Takeaways
- The core principle for modernizing a historic home is “reversibility”—every intervention should be removable without damaging the original structure.
- Always use breathable, lime-based mortars for historic brickwork. Modern cement traps moisture and will destroy old bricks.
- An addition should create a clear, honest “dialogue” with the old house through contrast or a transparent link, rather than attempting a poor-quality imitation.
Form vs Function: Why Minimalist Design Often Fails Users?
The minimalist mantra, “form follows function,” is often misinterpreted in the context of historic homes. When applied too literally, it can lead to stripping away the very details that give a building its soul and, ironically, its function. In a modern, new-build context, minimalism’s function is to create a sense of calm and clarity through the absence of ornament. But in a historic building, the ornament—the cornices, the deep skirting boards, the ceiling roses—*is* the function. These details tell the story of the building’s era, its status, and its craftsmanship. To remove them in the name of a clean aesthetic is to erase the narrative.
In a historic home, these details are the function; they provide the soul, character, and narrative.
– Heritage Design Principles, Architectural Preservation Quarterly
This is where minimalist design often fails users of historic spaces. A stark white box with no trim can feel cold, sterile, and alien within the context of a richly detailed Victorian or Georgian home. It creates a jarring disconnect and a space that feels unresolved. The “function” of a historic home is not just to provide shelter; it is to provide a connection to the past, a sense of place, and a richness of experience. Stripping that away for a fleeting design trend is a fundamental misunderstanding of the asset.
However, this does not mean minimalism has no place. Its power is most effectively harnessed not through erasure, but through contrast. A minimalist approach works brilliantly in a new extension or addition. Here, the clean lines and unadorned surfaces of the new structure do not compete with the historic detail of the main house. Instead, the minimalist addition acts as a quiet, neutral frame, making the richness of the original building seem even more vibrant and special. It celebrates both the old and the new by allowing each to be unapologetically itself.
Case Study: The Modern Addition Success Story
The HGTV show Houses with History provides excellent examples of this principle in practice. In their projects across Massachusetts, the preservationist team frequently demonstrates that the best application of minimalism is in new additions. By creating clean, modern extensions—often for kitchens or family rooms—they establish a clear dialogue with the ornate original structures. The minimalist space becomes a serene backdrop that highlights the intricate woodwork, plaster details, and historic character of the adjacent older rooms, proving that the most successful use of minimalism is in respectful contrast, not in compromising the original form.
Your journey to modernizing your historic home begins not with a sledgehammer, but with careful observation and a deep respect for its past. By adopting a philosophy of reversible intervention and making informed choices about materials and design, you become a custodian of its history, not just an owner. The next logical step is to conduct a thorough audit of your property’s historic fabric, identifying its character-defining features and areas of vulnerability before a single design is sketched.
Frequently Asked Questions About How to Modernize a Historic Home Without Destroying Its Value?
Where is asbestos typically hiding in pre-1990 homes?
Beyond obvious locations like popcorn ceilings, asbestos lurks in window putty, vinyl flooring, textured coatings (Artex), pipe insulation, cement siding, and drywall compounds used before 1990.
What’s the difference between friable and non-friable asbestos?
Friable asbestos crumbles easily when touched and releases dangerous airborne fibers, requiring immediate professional removal. Non-friable asbestos is stable when undisturbed and can often be managed in place or encapsulated.
How does asbestos discovery affect renovation financing?
Discovery can impact your insurance policy coverage, delay loan approvals for renovations, and require additional budget allocation for professional testing ($483 average) and certified removal before work proceeds.