Successful high-altitude trekking isn’t determined by your fitness level, but by your rigorous application of safety margins and system redundancy.
- Acclimatization is a non-negotiable physiological law, not a flexible guideline.
- Your insurance and gear choices must be based on a “margin of safety” for worst-case scenarios, not just ideal conditions.
Recommendation: Prioritize building redundancy into all your critical systems—water, navigation, and communication—to eliminate single points of failure.
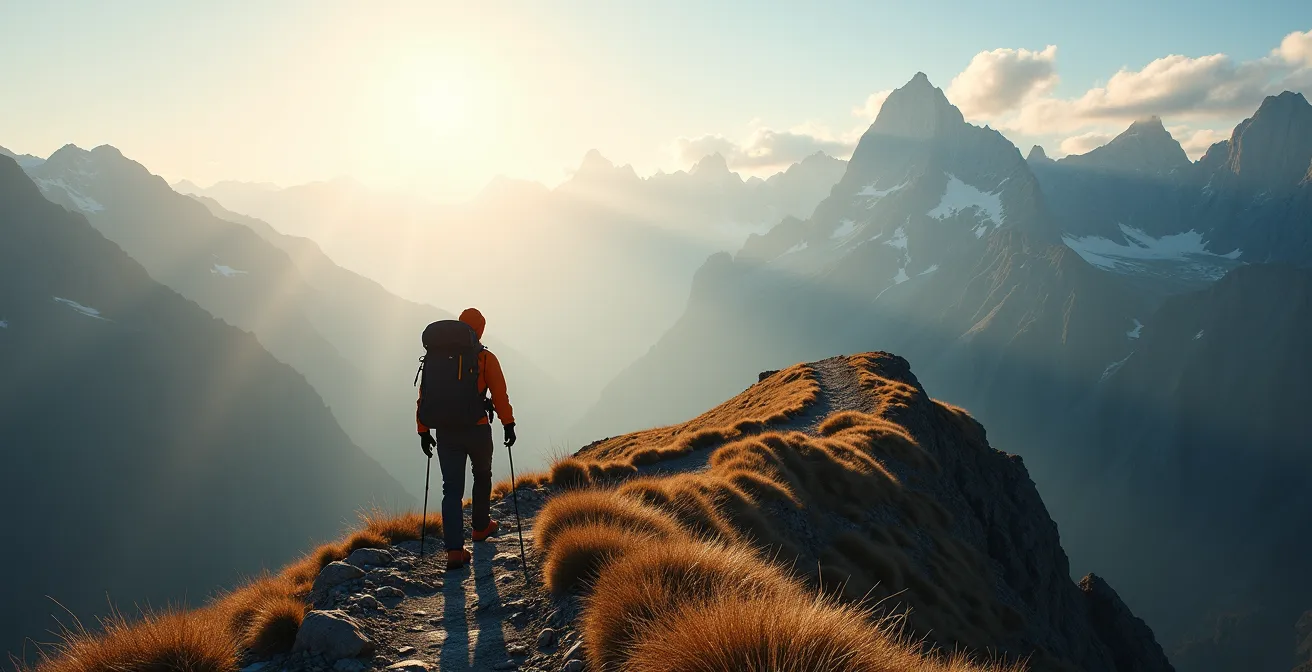
The dream of high-altitude trekking is potent: standing on a remote pass, surrounded by colossal peaks, with the world stretching out below. For the active traveler, it represents the ultimate adventure. In pursuit of this goal, most preparation focuses on a familiar checklist: get fit, break in your boots, and pack layers. While this advice is not wrong, it is dangerously incomplete. It addresses the expected challenges but ignores the insidious nature of risk at altitude.
The greatest dangers in the mountains rarely stem from a single, dramatic event. Instead, they arise from a cascade of failures—a chain reaction started by one seemingly small oversight. A minor weather misjudgment leads to getting wet, which accelerates heat loss and impairs judgment, resulting in a navigational error just as conditions worsen. This is the reality of risk management above 4,000 meters.
This guide is not another list of tips. It is a mountaineering guide’s approach to safety, built on a framework of understanding failure points, building in redundancy, and maintaining a non-negotiable margin of safety. We will deconstruct why “climb high, sleep low” is an unbreakable law of physiology, analyze the fine print of helicopter evacuation insurance, and explore the critical trade-offs between ultralight gear and your survival buffer. The goal is to shift your mindset from simply preparing for a trip to actively managing risk in an extreme environment.
To navigate these critical topics, we have structured this guide to address the most pressing safety questions a first-time high-altitude trekker should be asking. Each section tackles a specific risk, providing the protocols and expert insights needed to build a robust safety plan.
Contents: Preparing for High-Altitude Expeditions
- Why “Climb High, Sleep Low” Is Non-Negotiable
- How to Verify if Your Travel Insurance Covers Helicopter Evacuation?
- Filter or Tablets: Which Is Safer for Remote Expeditions?
- The Risk of Solo Trekking in Unmapped Territories
- Choosing a Beacon: PLB vs Satellite Messenger for SOS?
- The Weather Mistake That Turns a Nature Walk into a Nightmare
- The Risk of Overestimating Your Stamina on Multi-Day Trips
- Ultralight Hiking Gear: Is Saving 500g Worth the Cost?
Why “Climb High, Sleep Low” Is Non-Negotiable
Of all the rules in the high-altitude environment, none is more critical than the acclimatization mantra: “climb high, sleep low.” This isn’t a friendly suggestion; it’s a physiological imperative. Your body adapts to the thin air not by simply spending time at altitude, but by being stressed by a higher altitude during the day and then recovering in the oxygen-richer air of a lower elevation at night. This process stimulates the production of red blood cells, which are essential for transporting oxygen.
Ignoring this principle is the fastest way to develop Acute Mountain Sickness (AMS), or its life-threatening progressions, High-Altitude Cerebral Edema (HACE) and High-Altitude Pulmonary Edema (HAPE). Professional guides build their itineraries around this law. The Wilderness Medical Society’s guidelines are clear and based on extensive research into altitude pathology. For instance, their protocols state there should be no more than a 500m gain in sleeping altitude per night once you are above 3,000 meters, with a rest day scheduled for every 1,000 meters gained.
An itinerary that features rapid, successive gains in sleeping elevation is a significant red flag. It places your body in a state of physiological debt it cannot repay. The daily acclimatization hikes—climbing several hundred meters above your camp and then descending to sleep—are not optional excursions. They are the core mechanism that allows your body to safely adapt. Treating them as such is the first and most important step in your risk management strategy.
How to Verify if Your Travel Insurance Covers Helicopter Evacuation?
In a remote mountain environment, a serious injury or severe altitude sickness makes a helicopter the only viable option for evacuation. However, the assumption that standard travel insurance covers this scenario is a common and costly mistake. Most basic policies have low altitude limits (often around 3,000 meters) and explicitly exclude search and rescue or high-altitude helicopter operations. The financial consequences can be devastating, as medical evacuation costs can reach up to $300,000 in regions like the Himalayas.
Verifying your coverage requires a forensic examination of the policy wording. You must look for three key things: the maximum altitude covered, explicit inclusion of “helicopter evacuation,” and the terms for “search and rescue.” Many policies require pre-approval before a rescue is initiated, a near-impossibility when you are incapacitated and out of communication. This is where specialized providers like Global Rescue or World Nomads’ Explorer plan become essential, as their services are designed for these specific eventualities.
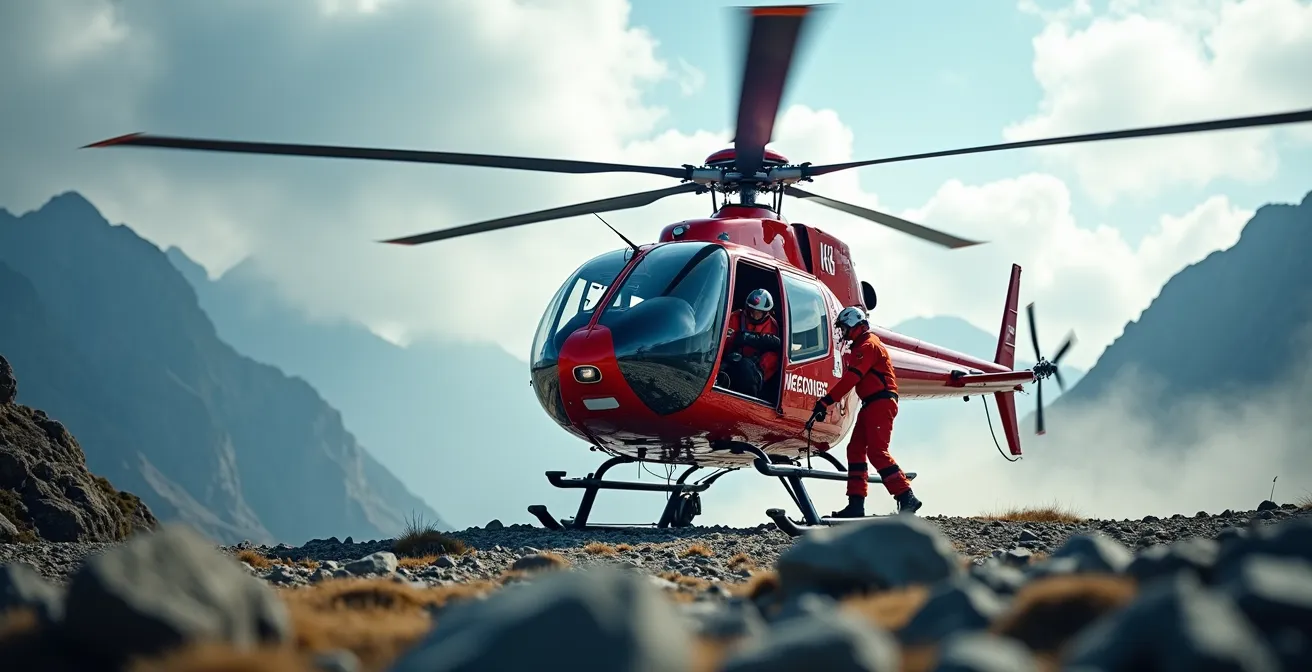
Before purchasing a policy, call the provider and ask direct questions: “Does this policy cover helicopter evacuation from 5,500 meters in Nepal for symptoms of HACE? Is pre-approval required?” Get the answers in writing. Your insurance is not a box to be ticked; it is your single most important piece of financial safety gear. Treating it with any less diligence is an unacceptable risk.
The table below highlights the critical differences between standard insurance and specialized high-altitude coverage. Note how altitude limits and the inclusion of helicopter evacuation are the primary differentiators, reflecting the specialized nature of this risk.
| Provider | Altitude Limit | Helicopter Evac | Annual Cost |
|---|---|---|---|
| Global Rescue + High Alt | No limit | Yes | $790+ |
| World Nomads Explorer | 6,000m | Yes (pre-approval) | $150-250/trip |
| Rise & Shield Adventure | 6,500m | Yes (pre-approval) | $200-300/trip |
| Standard Travel Insurance | 3,000m | Limited | $100-150/trip |
Filter or Tablets: Which Is Safer for Remote Expeditions?
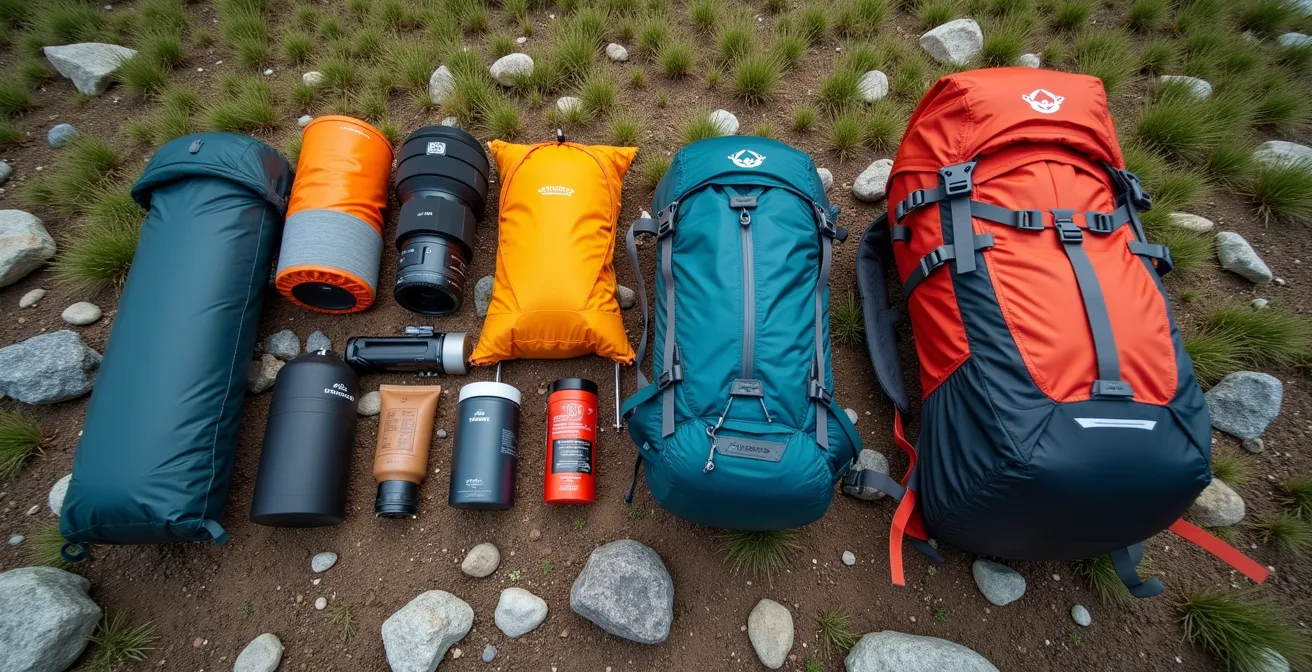
Access to safe drinking water is a non-negotiable pillar of expedition health. The debate between using a water filter versus chemical purification tablets often misses the most critical point: in a high-altitude environment, relying on a single system is a design for failure. The guiding principle must be redundancy. Every experienced guide knows that any piece of gear can and will fail, usually at the worst possible moment.
Water filters, while excellent for removing protozoa and bacteria, have well-known failure modes in the mountains. Their membranes can freeze and crack in sub-zero temperatures, rendering them useless. They are also highly susceptible to clogging from the fine glacial silt present in many high-altitude water sources. Chemical tablets, like chlorine dioxide or iodine, are an excellent backup. They are lightweight, immune to cold, and effective against viruses that filters might miss. However, their efficacy is reduced in very cold water, and they have a finite supply.
The Redundancy Principle in Action
Professional mountain guides recommend carrying both a primary filtration system (like a gravity filter) and a backup chemical purification method. In extreme conditions, when a filter freezes overnight or clogs with glacial silt, the tablets become the primary system. This combination ensures reliable access to safe water, regardless of the specific conditions encountered. The minimal weight penalty is a small price to pay for eliminating a critical single point of failure.
A robust water strategy involves carrying two independent systems. Your primary system might be a filter for taste and speed, but you must also carry a full course of chemical tablets as a complete backup. The table below outlines the common failure points and the corresponding backup solutions, illustrating the importance of this two-system approach.
| Method | Common Failure Mode | Backup Solution | Weight Penalty |
|---|---|---|---|
| Gravity Filter | Freezing/clogging | Chlorine dioxide tabs | +50g |
| UV Purifier | Battery failure | Iodine tablets | +30g |
| Chemical Tablets | Finite supply | Portable filter | +200g |
| Boiling | Fuel shortage | Purification tablets | +40g |
The Risk of Solo Trekking in Unmapped Territories
Solo trekking appeals to the sense of self-reliance and quiet contemplation, but in unmapped or remote high-altitude terrain, it exponentially increases risk by creating a single point of failure: you. A twisted ankle on a busy trail is an inconvenience; a twisted ankle ten miles from the nearest person in an unmapped valley is a life-threatening emergency. There is no partner to double-check a navigational decision, assist with first aid, or call for help if you are incapacitated.
As Everest summiteer Ian Taylor notes, this lack of cross-checking is a critical vulnerability. In his “High Altitude Trekking Tips,” he states a profound truth about solo travel in extreme environments:
A small solo mistake cannot be cross-checked. This single point of failure can cascade into a life-threatening situation.
– Ian Taylor, Everest Summiteer, High Altitude Trekking Tips
Mitigating this risk, if you choose to undertake a solo expedition, requires a level of planning far beyond that of a group trek. It involves creating a system of external checks and pre-defined protocols that act as your virtual partner. This includes a detailed “flight plan” left with a trusted contact, mandatory check-in times, and clear criteria for initiating a rescue. It means carrying redundant navigation tools and having the discipline to use them consistently. Your risk management plan becomes your lifeline, and it must be flawless.
Action Plan: Solo Trekking Risk Mitigation Protocol
- File a detailed ‘flight plan’ with a trusted contact, including your route, planned campsites, and estimated timings for each leg.
- Establish mandatory check-in times (e.g., every 12 or 24 hours) using a satellite messenger or PLB.
- Define clear ‘panic button’ criteria with your contact: if no check-in is received within a specified window (e.g., 6 hours past the deadline), they are to initiate a rescue operation.
- Pre-identify and mark bailout points and escape routes on your map for every major section of your route.
- Create decision gates at key navigational junctions with specific go/no-go criteria based on weather, time, and physical condition.
Choosing a Beacon: PLB vs Satellite Messenger for SOS?
When you are beyond the reach of cellular service, a personal locator beacon (PLB) or a satellite messenger is your only connection to emergency services. Choosing between them is a critical decision that hinges on understanding their fundamental differences in function and philosophy. This choice is another application of the redundancy and margin of safety principles.
A PLB (Personal Locator Beacon) is a dedicated, one-function device. When you trigger its SOS button, it sends a powerful 406 MHz signal directly to the international Cospas-Sarsat satellite network, which is monitored by government rescue agencies. It is a simple, robust, and highly reliable distress signal. Its primary limitation is that it’s a one-way communication device; you cannot provide details about your emergency or know if your signal has been received.
A satellite messenger (like a Garmin inReach or Zoleo) operates on a commercial satellite network (e.g., Iridium). Its key advantage is two-way communication. You can send and receive text messages, allowing you to describe the nature of your emergency (e.g., “twisted ankle, not life-threatening” vs. “severe head injury, immediate evac needed”), which helps rescue teams allocate resources appropriately. You also receive confirmation that your message was received. The trade-off is that they rely on commercial networks and require a subscription plan. For the ultimate safety margin, many seasoned mountaineers carry both: a satellite messenger for communication and a PLB as a foolproof backup.
The Weather Mistake That Turns a Nature Walk into a Nightmare
In the high mountains, weather is not just a topic of conversation; it’s a primary determinant of survival. The most dangerous weather situations often begin not with a sudden, violent storm, but with a subtle change that is misread or ignored. A trekker pushing for a summit might dismiss the harmless-looking lenticular clouds forming over the peak, not realizing they are a clear indicator of hurricane-force winds developing at altitude. This is the start of a failure cascade.
The Cascade of Weather Consequences
A single weather mistake can trigger a devastating chain reaction. As detailed by guides at Altezza Travel, getting wet from an unexpected shower leads to rapid body heat loss. This induces mild hypothermia, which critically impairs cognitive function and decision-making. This mental fog often results in navigational errors, causing a trekker to become lost just as the weather worsens. The combination of being wet, cold, disoriented, and mentally compromised transforms a manageable situation into a life-threatening emergency requiring rescue.
To avoid this, you must learn to read the sky and have pre-defined rules for action. This means abandoning summit attempts or descending to safety based on clear, objective weather indicators, not on wishful thinking. A disciplined approach to weather involves setting hard “turn-around” times and adhering to them, regardless of how close the goal seems. Your ego is your enemy; the mountain will be there tomorrow. The key is to ensure that you will be, too.
A structured, if-then framework for decision-making removes emotion and ego from the equation. Here are some examples of weather-based rules used by professional guides:
- IF clouds begin to cover the summit by 10 AM, THEN descend immediately, as afternoon visibility will be zero.
- IF the wind becomes strong enough to make conversation difficult, THEN find or create shelter within 15 minutes.
- IF cumulus clouds build vertically before noon, THEN expect severe afternoon thunderstorms with lightning.
- IF the temperature drops more than 5°C in 30 minutes, THEN assume a major weather system is approaching and take defensive action.
The Risk of Overestimating Your Stamina on Multi-Day Trips
Many active travelers arrive for a high-altitude trek in peak physical condition, confident in their stamina. This confidence, however, can be a liability. The error is assuming that sea-level fitness translates directly to performance at altitude. It does not. Pushing too hard in the initial days of a trek, before you are fully acclimatized, is like making a massive withdrawal from a bank account with limited funds. You create a physiological deficit that becomes nearly impossible to recover from.
This overexertion is a primary trigger for AMS. Your body, already struggling to cope with less oxygen, is put under immense strain, leading to exhaustion, severe headaches, and nausea. Unfortunately, these early AMS symptoms are often misinterpreted as simple fatigue from a hard day’s hike. Ignoring them and continuing to push “through the pain” is a classic mistake. As research shows that approximately 40% of Everest Base Camp trekkers experience some AMS symptoms, recognizing them is critical.
A high-altitude training expert, quoted by Ian Taylor Trekking, provides the perfect mental model for managing your energy at altitude:
Frame the trek like a bank account. You start with certain capital (your fitness). Pushing too hard early puts you into a deficit that is almost impossible to recover from at altitude.
– High Altitude Training Expert, Ian Taylor Trekking Guide
The correct strategy is to start deliberately slow, even if you feel you can go faster. Conserve energy. Walk at a pace where you can maintain a full conversation without gasping for breath. Let your body adapt. The goal is not to win a race on day one, but to have the strength and health to stand on the summit on day ten. Acknowledge that your sea-level strength is only one part of the equation; patience is the other.
Key Takeaways
- The “Climb High, Sleep Low” rule is a physiological law, not a flexible guideline. Violating it is the most common cause of altitude sickness.
- True safety lies in redundancy. Backup water purification, navigation, and communication systems are mandatory, not optional extras.
- Never sacrifice your margin of safety (e.g., warmer gear, comprehensive insurance, extra fuel) for minimal weight or cost savings.
Ultralight Hiking Gear: Is Saving 500g Worth the Cost?
The ultralight backpacking movement has brought valuable innovations in gear, but applying its philosophy wholesale to high-altitude trekking can be a dangerous trap. The core question is not “Is this lighter?” but “Does this reduction in weight compromise my margin of safety?” At 5,000 meters, in a sudden storm, that margin of safety is all that separates a manageable incident from a crisis.
A risk-adjusted approach to gear selection is essential. Items where failure has low consequences, like stuff sacks or spoons, are excellent candidates for going ultralight. However, when it comes to your core survival systems, caution is paramount. A 300g ultralight backpack with a minimal frame might be fine for a weekend trip, but will it carry the load comfortably for 14 days and withstand the abrasion of rocky terrain? Will an ultralight sleeping pad that fails leave you shivering on frozen ground?
Your insulation, shelter, and communication gear are where the margin of safety must never be compromised. As professional guides emphasize, the extra 300g of a standard -5°C sleeping bag over an ultralight +5°C quilt is your insurance against forecast errors, a slower metabolism due to altitude, or an unplanned emergency bivouac. That small weight penalty can mean the difference between a restless night and the onset of hypothermia. The weight saved on a non-essential item can be “spent” on a more robust piece of critical gear.
The Margin of Safety Principle
Professional guides emphasize that a standard -5°C sleeping bag provides a crucial margin for error compared to an ultralight +5°C quilt. In unpredictable mountain conditions, this 10-degree buffer can mean the difference between a restless night and hypothermia. The extra 300g is essentially insurance against forecast errors, altitude effects on metabolism, and emergency bivouacs. This principle applies to all critical gear: it’s better to carry a slightly heavier but more reliable stove, a more durable shelter, or a warmer jacket.
Now that you understand the principles of risk mitigation, the next step is to apply them. Start by auditing your current trekking plan and gear list against these fundamental principles of redundancy and safety margins. This methodical approach is what transforms an aspiring trekker into a safe and successful mountaineer.